Using Amazon SES with Rails
 by Abe Petrillo
on September 26, 2016
by Abe Petrillo
on September 26, 2016
Like many developers, we made the decision to rely on a third party service to send our emails. We have been using SendGrid for a long time now, and have so far been letting the odd delay or two go because of the overall reliability. We are now working at a much larger scale, so not only do we need a more timely service, we also need to be able to load balance our traffic across a variety of providers to ensure we have a plan B if one of our providers goes down. This became a priority after the more recent outages experienced by SendGrid, and in our travels around the web we came across Amazon SES. There are some quirks getting this up and running, so we thought we’d share what we’ve learned here at Alphasights.
The Setup
Amazon SES provides an SMTP endpoint, so we can rely on the regular ActionMailer setup, example as follows:
Rails.application.configure do
  config.action_mailer.smtp_settings = {
    user_name: ENV['SMTP_USER_NAME'],
    password: ENV['SMTP_PASSWORD'],
    address: ENV['SMTP_ADDRESS'],
    domain:  ENV['SMTP_DOMAIN'],
    port: ENV['SMTP_PORT'],
    authentication: ENV['SMTP_AUTHENTICATION'],
    enable_starttls_auto: ENV['SMTP_ENABLE_STARTTLS_AUTO'] == 'true'
}
end
Note: “enable_starttls_auto” must be set to true to work with Amazon SES
Generating the SMTP credentials is pretty straight forward. You can find the link below, and the documentation is pretty clear so I won’t repeat it here.
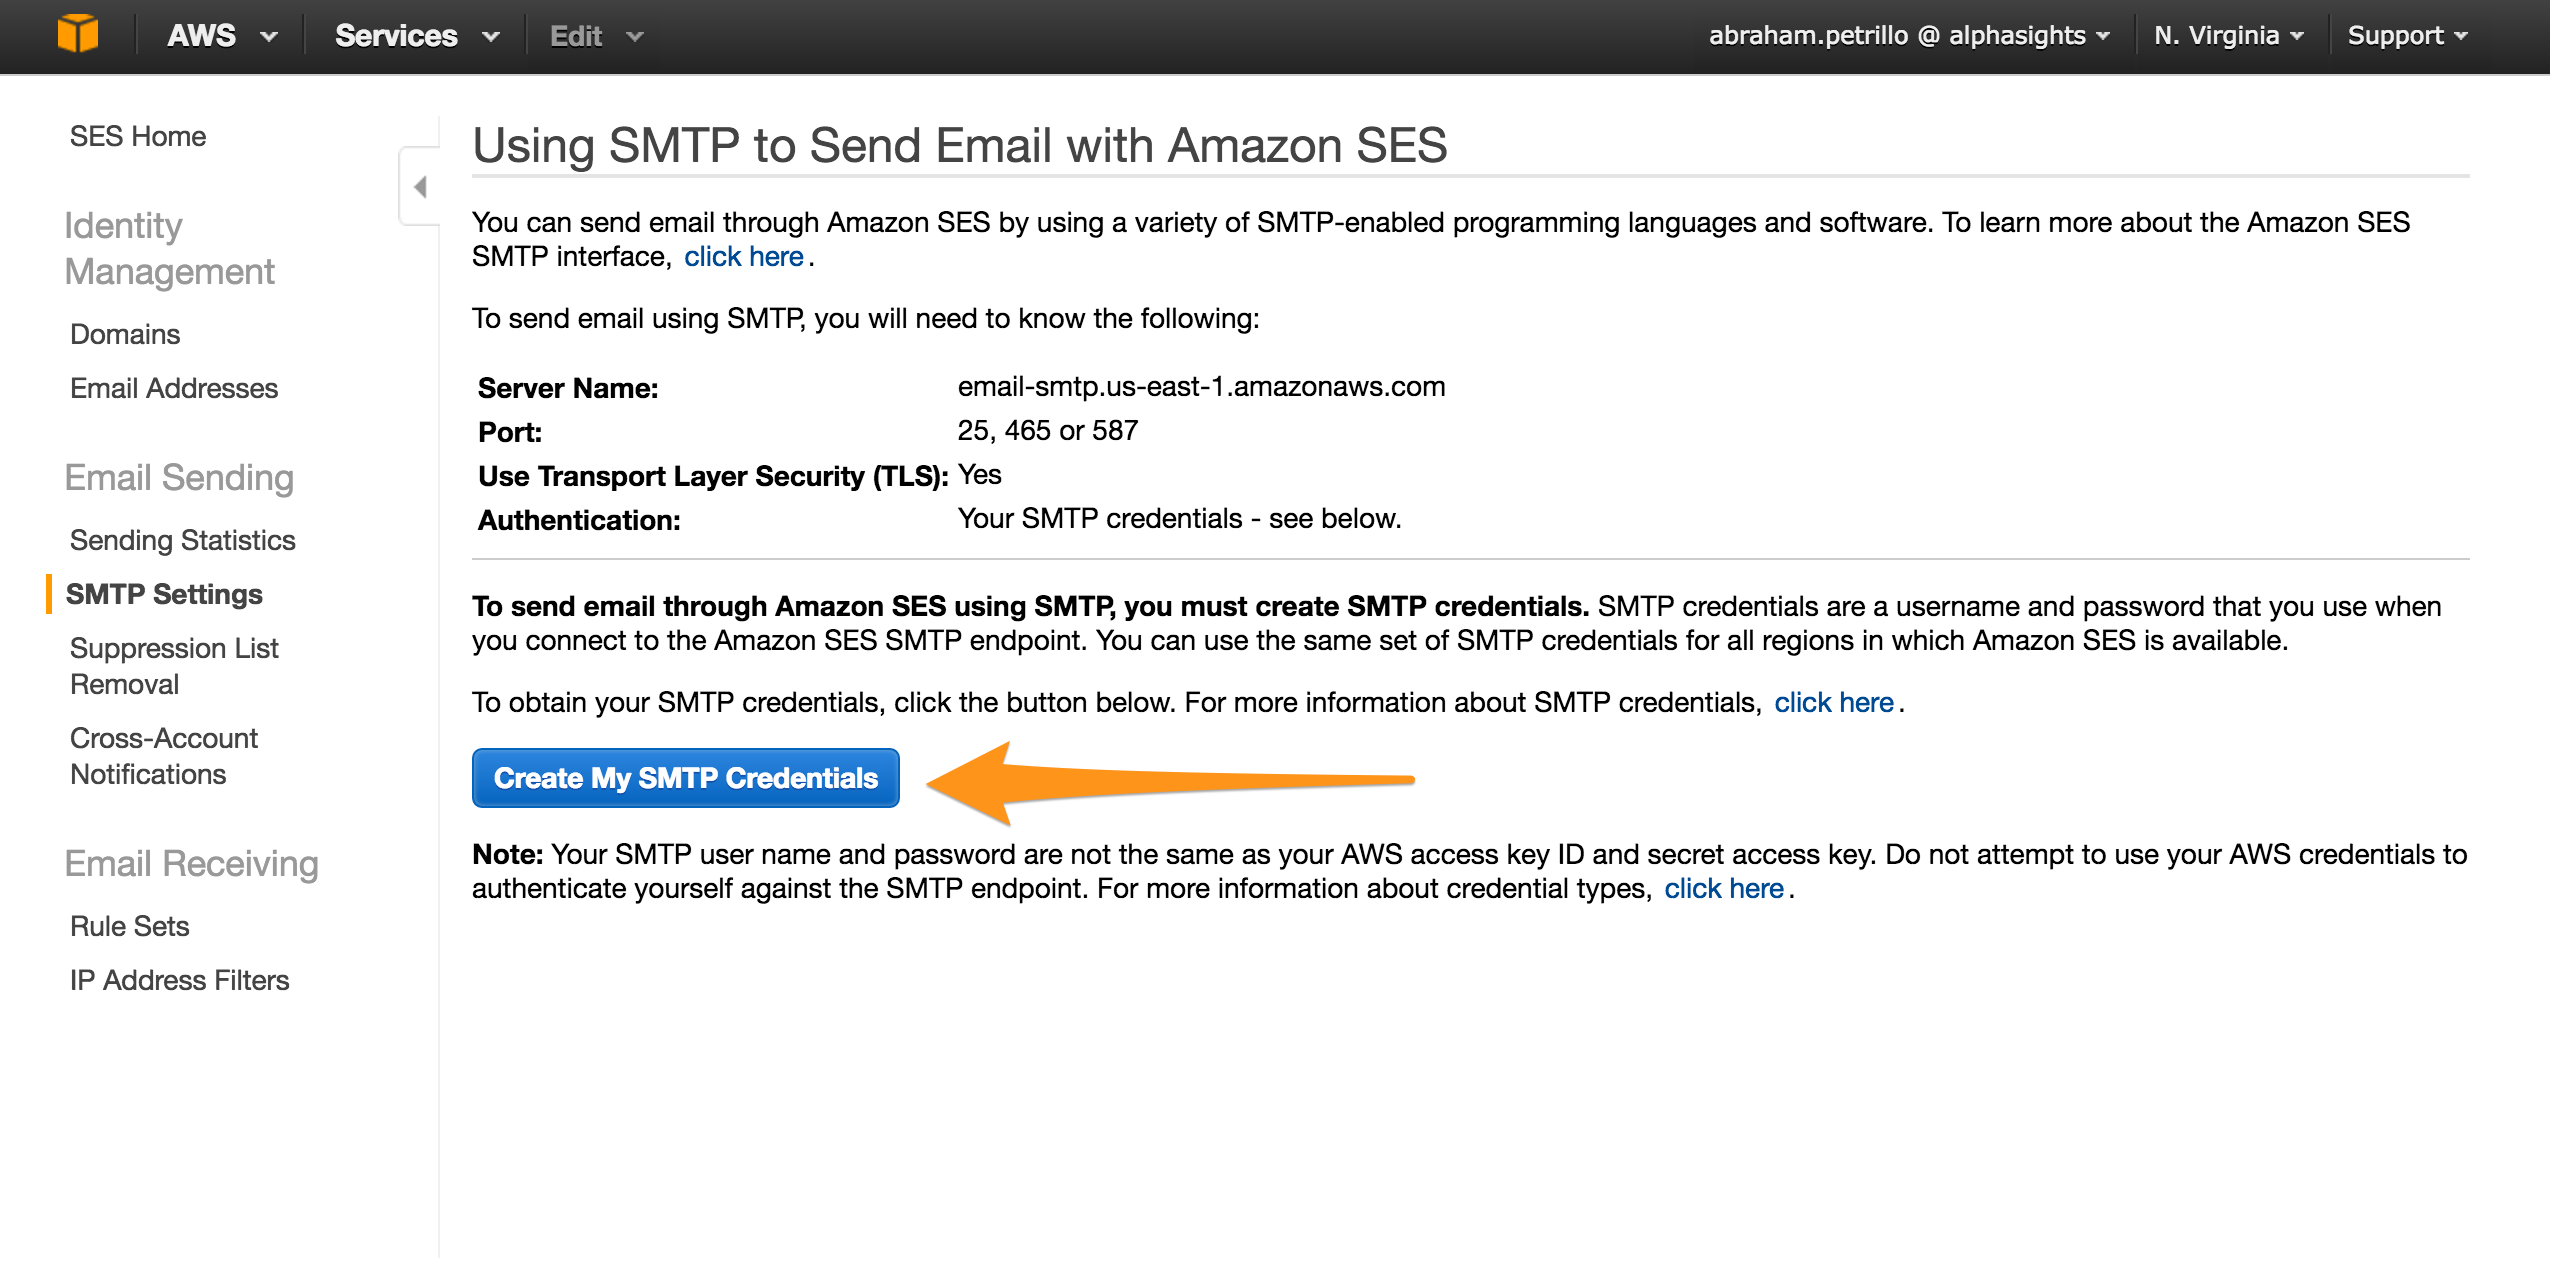 |
|---|
| https://console.aws.amazon.com/ses/home?region=us-east-1#smtp-settings |
If you are familiar with spam filters, there is no avoiding the management of SPF records. We didn’t want to undo all the good work we had done over the years of optimizing these settings to ensure that we don’t end up in our clients’ spam filters, which is a much harder challenge than you would think! So we followed the recommendation by amazon to use a sub-domain that had a DNS entry similar to:
v=spf1 include:amazonses.com -all
Without going into too much detail, this adds amazon’s subnet to the list of allowed hosts that are allowed to send emails on your behalf. By using a subdomain, you also avoid the “mailed by amazonses.com” tag on email clients like gmail. To verify your DNS settings were set correctly you can use:
dig my-subdomain.my-domain.com TXT
expected result:
my-subdomain.example.com. 300 IN TXT "v=spf1 include:amazonses.com ~all"
You can also look directly at amazon’s SPF entry, and see what permissions you are providing by executing: dig amazonses.com TXT
Amazon provides a helpful UI which you can use to make sure everything works, and the DNS settings are as expected which we recommend using before adding the complication of your own app.
The Quirks
After we had set everything up, for some reason our emails were being flagged as spam by gmail. We went around in circles, from comparing SPF records to checking our email headers to see if Amazon was somehow changing them. The problem turned out to be related to this requirement:
Before you can send an email using Amazon SES, you must verify each email address (or the domain of the email address) that you will use as a “From”, “Source”, “Sender”, or “Return-Path” address to prove that you own it. If your account is still in the Amazon SES sandbox, you also need to verify any email addresses that you send emails to except for email addresses provided by the Amazon SES mailbox simulator. You can verify an email address or domain by using the Amazon SES console or by using the Amazon SES API.
The above is quite clear, but they leave something out. If you have verified an email address, but also whitelist a whole domain, the two verifications conflict. In our case, real_email@my-domain.com was a verified email address, but was going to spam. If we used a fake email address like fake@my-domain.com we would get through without any problems. This is because the verification of an email takes precedence over a domain level verification. In our case that meant we had a different rule set for real_email@my-domain.com. Which means that we had setup all our DNS, DKIM and SPF settings for our email to come from our subdomain, but the verified email was using the default settings of sending the email from amazonses.com.
The Fail over
Now we have reliably used both services, switching between them is as simple as:
heroku config:set
SMTP_ADDRESS=amazon.com
SMTP_AUTHENTICATION=login
SMTP_DOMAIN=my-domain.com
SMTP_PASSWORD=my-pass
SMTP_PORT=587
SMTP_ENABLE_STARTTLS_AUTO=true
-a myapp
We are now ready to quickly alternate between the two if there’s a problem or if we decide that one provider is too expensive. The reason we had not switched providers sooner was the assumption that the complexity was too high for the value. We assumed another API would have to be implemented, or the dependency on another library like aws-ses would be required. Under the pressure of trying to put out the fire that is Sengrid we were forced to look at other alternatives, and how to quickly get them up and running. In this scenario SMTP, although ugly, really shines through. Understanding SPF really wasn’t that bad and is well documented.
What’s next?
From the above you may have guessed we are currently using Amazon SES on some of our Rails apps but not all. We want to get to a place where one Rails app can use multiple providers, and load balance the email traffic across them all. This has some challenges including being able to swap provider without rebooting the app, therefore avoiding the use of “Rails.application.configure”. We also need to come up with a way of weighting the providers based on known performance, which may be coming in a later blog post.